Rub-bots
The Rub-bots are a set of physical robots constructed in July/August 2021 to facilitate Smallpeice 2021. For that competition, they were called the 'Forklift-bots' to keep with the theme of the game. After that, they became the 'rub-bots' - named to reflect the fact that they were designed to perfectly fit inside the 18L Really Useful Boxes ('RUBs')
The design was intended to be robust so the robots would last long enough to be used for many future events, as demo-bots and to be offered to participants for outreach events.
The bots have:
- 2 wheel differential drive
- a servo-driven linear gripper
- a forward-facing ultrasound distance sensor
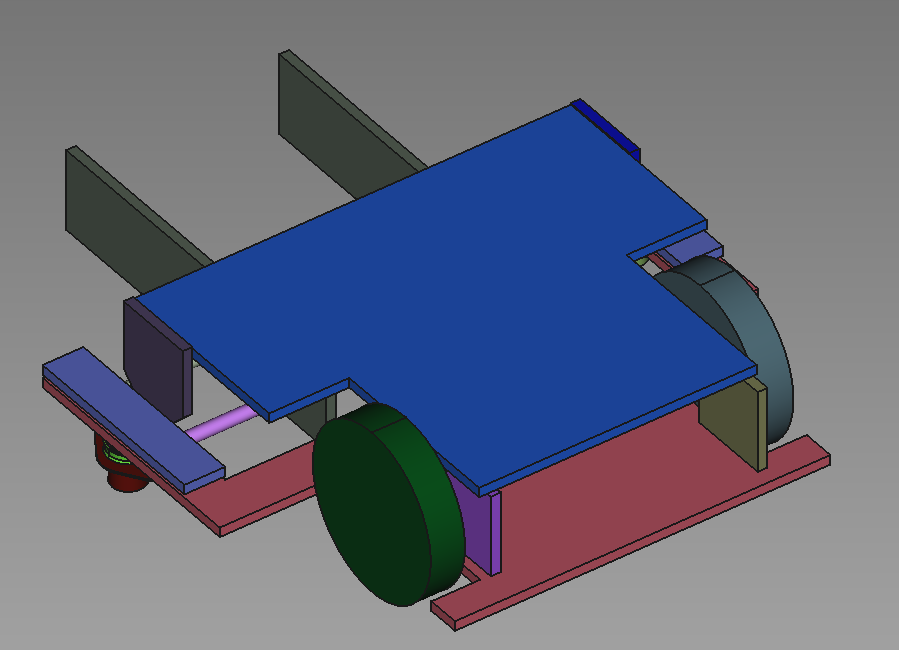
Chassis
The chassis is made of plywood, cut on a band saw and screwed together as follows. All screw joints should be pilot drilled.
- Add forearm parts with 4 screws
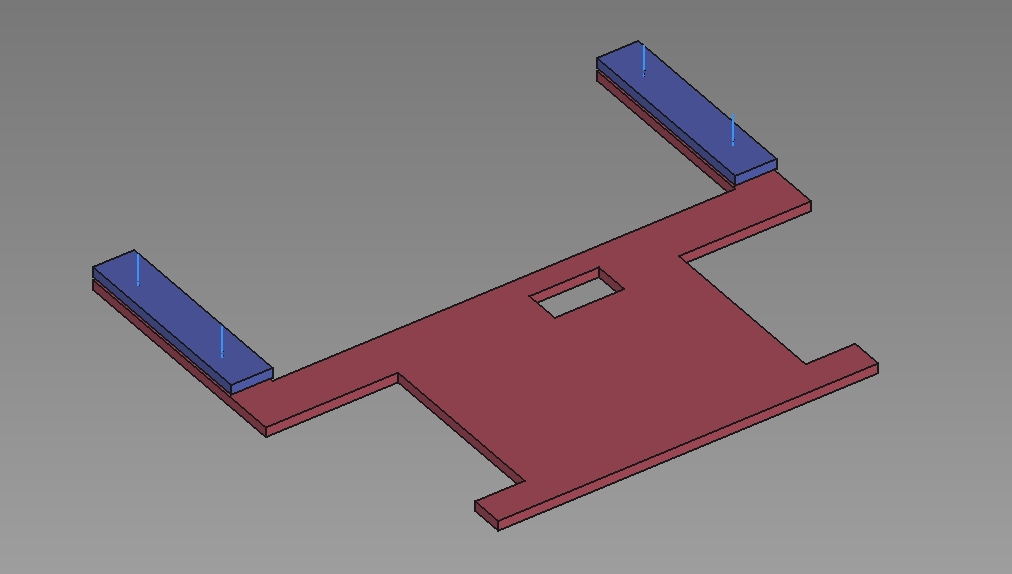
- Drill undersized holes for 8mm linear rods (approx 7.5mm)
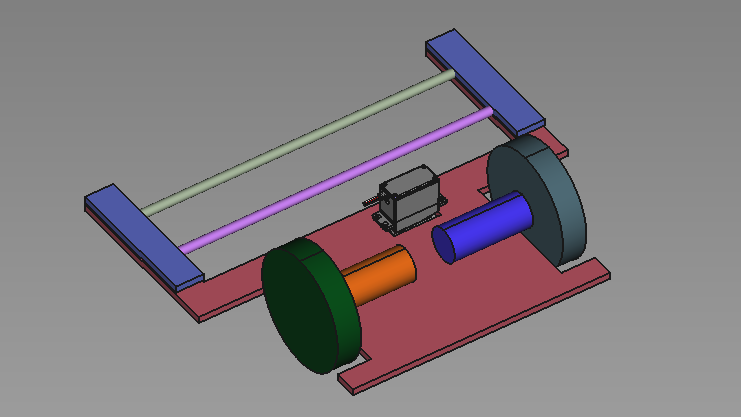
- Mount the servo and motors
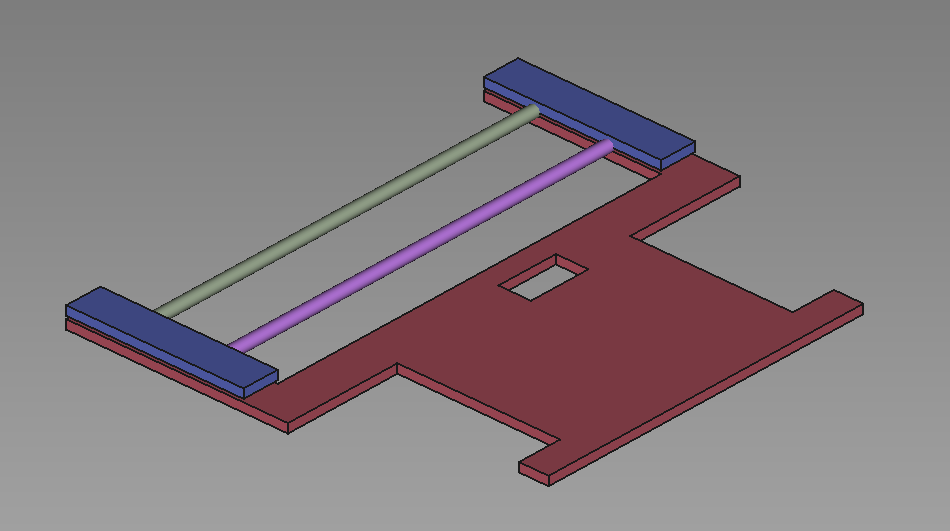
- Drill clearance holes for the casters, adding a skate bearing with 3D printed pulley on each bolt. Put a washer between the chassis and the skate bearing
- Press the LM8UU bearings into the gripper arms, and slide them onto the rods
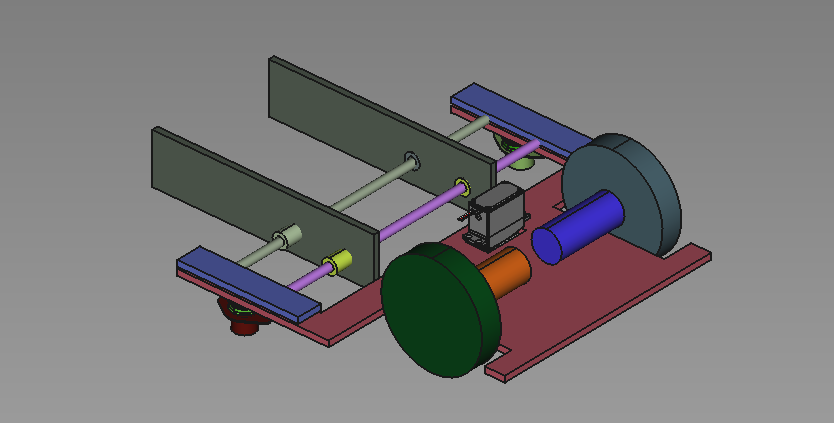
- Add riser blocks to each corner
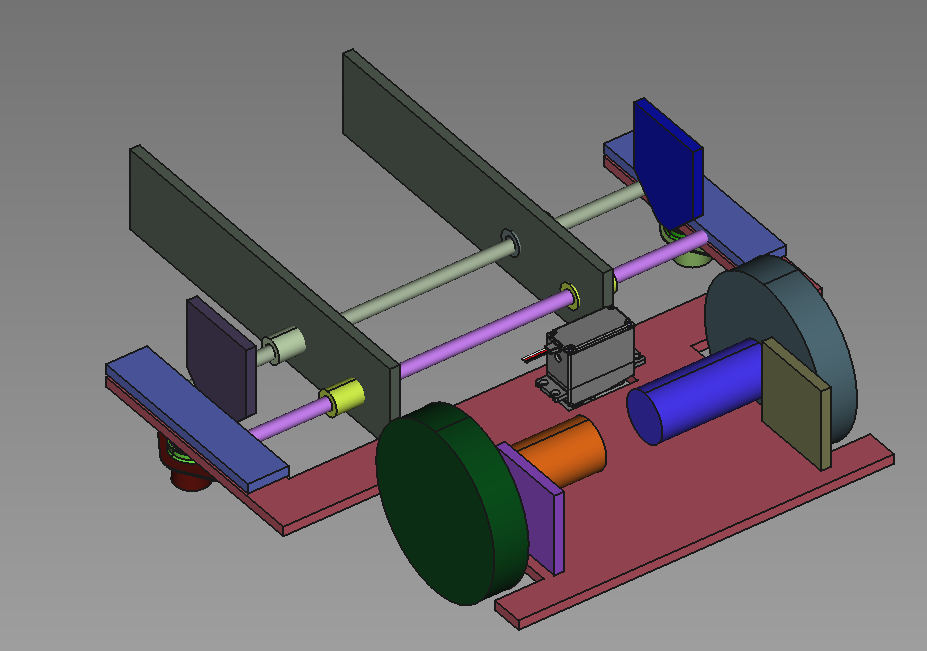
- Add the upper plywood support
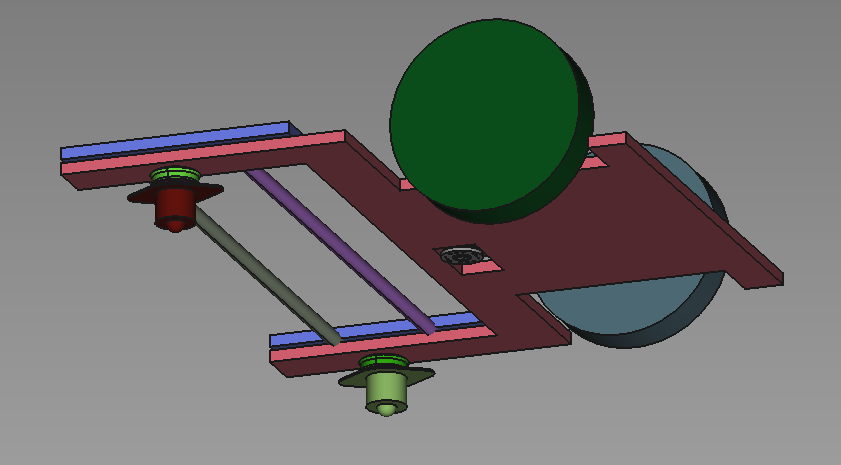
- Add the servo horn to the servo, and the LiPo holder to the back of the robot
- Add the electronics kit on top. Optionally add sensors (ultrasound, vision, ...)

- String up the servo mechanism. This is explained in depth further down this page
- Celebrate by programming the robot and watching it drive itself around
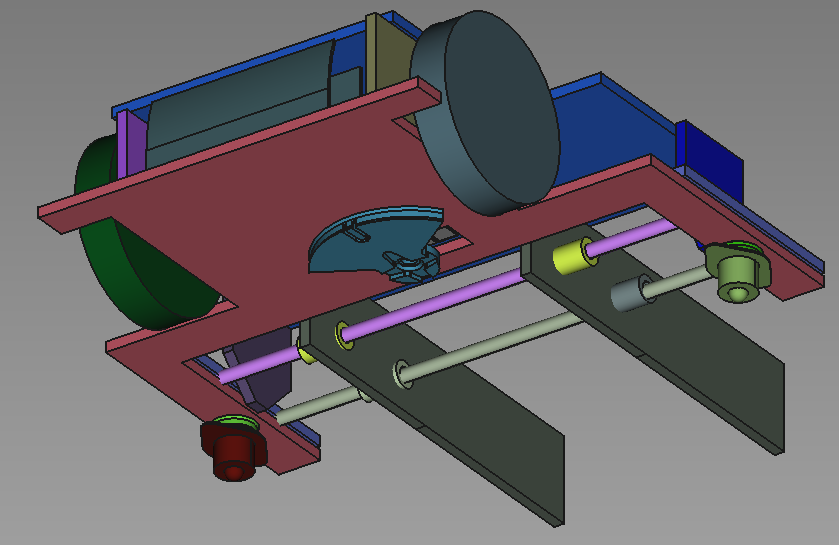
Servo mechanism
The gripper is connected to its servo via 'lightweight inextensible strings' (at least in theory). They're actually lengths of Nylon fishing line, which does stretch quite a bit. The complicated bit is connecting the grippers to the servo such that both grippers are pulled open and pulled closed symmetrically, as below:
To string up a rub-bot
- String 1:
- Tie the string to gripper 1 securely - e.g. using a overhand stopper knot through a pair of drilled holes in the gripper. You can double up the string to reduce the stretch of the fishing line
- Hook the string around the nearest idler
- Position the gripper in the middle of its range (halfway between open and closed) and the servo in the middle of its range
- Tie the other end off on the servo. You can weave between the servo horn and the pulley to help secure this end
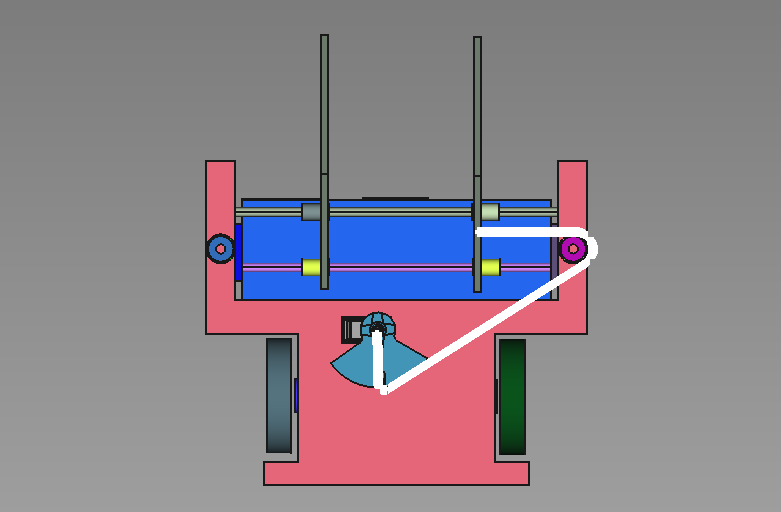
This string pulls gripper 1 open
- String 2:
- Tie the string to gripper 1 securely, heading in the other direction to
String 1. IfString 1was opening gripper 1,String 2will be closing it - Hook the string around the other idler (not the one
String 1used). The string may pass through gripper 2 without interacting with it - Check gripper 1 and the servo are in their middle positions, and pull
String 2tight.String 1andString 2will stretch a bit - Tie the end off on the servo, as before
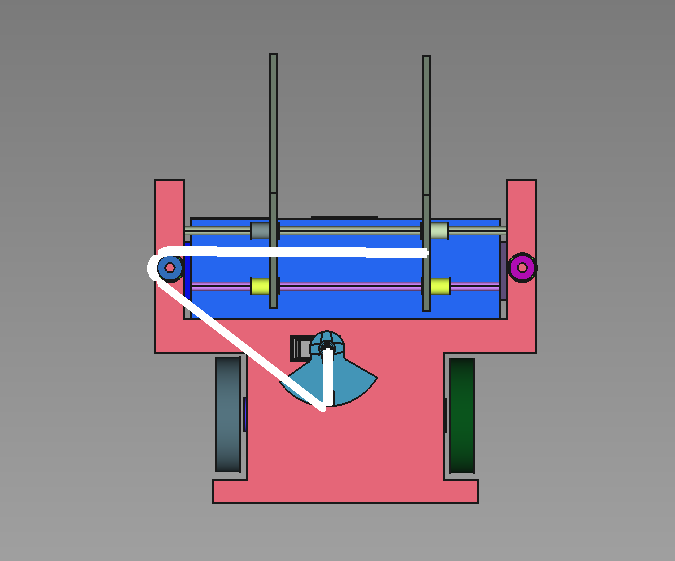
This string pulls gripper 1 closed
- Tie the string to gripper 1 securely, heading in the other direction to
- String 3:
- Tie onto gripper 2
- Hook round the idler nearest
- Pass through both grippers without tying to either
- Hook round the other idler
- Tie off on the servo
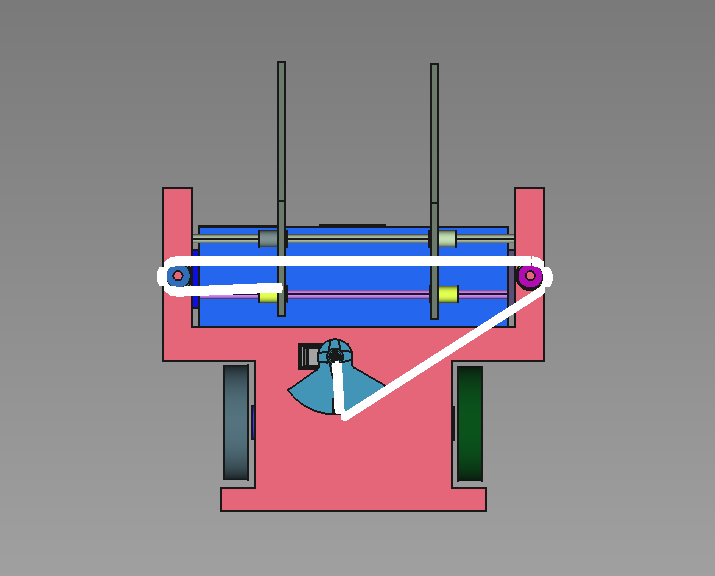
This string pulls gripper 2 open. By going around both idlers like this, gripper 2 opening and gripper 1 opening happen when the servo goes clockwise. Otherwise, gripper 2 closes when gripper 1 opens, which is not very useful.
- String 4:
- Tie onto gripper 2, heading the other way
- Hook round the near idler
- Go through both grippers
- Hook round other idler
- Tension the strings and tie off on servo
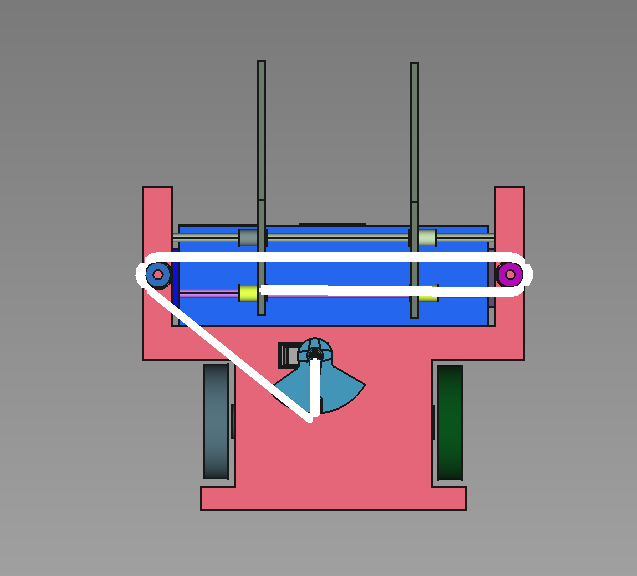
This string pulls gripper 2 closed, synchronised with gripper 1 closing
The servo is powered from the secondary '5V' output of the power board. The power board is rated to supply enough current for one servo, so a separate servo board isn't needed.